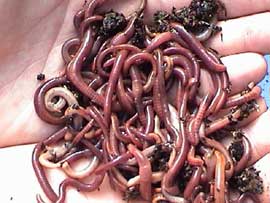
 Some of you will have seen this before, but for the newcomers in the crowd…
When I first told my wife Michelle I was going to keep worms in a bin to turn our food scraps from garbage into compost, she said no way. She was like “Worms in my kitchen? Forget it.”
But guess what? We have a bin full of worms in the kitchen and have had for several months. Isabella, my two-year-old daughter, loves to look at them and Michelle even admitted to feeling sad on the day we thought the worms were dead (they weren’t. they were just having a meeting in a hidden corner).
Some people have emailed me that worms create nitrous oxide, a greenhouse gas. No one has emailed me to say whether they make more nitrous oxide than the food scraps would if they were sent to the landfill, where they would create methane. Either way, I like the worms and think they help us appreciate the cycles of nature. The harvested worm castings end up going back to the earth.
So here, for your delectation, via the Lower East Side Ecology Center (LESEC), are directions for keeping your own worm bin. If you live in New York, you can get worms from LESEC. If not, you can get them here.
Why Compost With Worms Indoors?
Worm composting is a method for recycling food waste into rich compost right in your apartment, basement or garage. In a nutshell, worm compost is made in a container filled with moistened bedding and red worms. You will need one pound of red wiggler worms to handle up to 3 pounds of kitchen scraps per week in a bin that should be at least 16” (wide) x 19” (long) x 12”(deep).
If you are feeling adventurous, you can also make your own bin! Some basic instructions for building a worm bin can be found at the end of this text.
Choose a bin
Build a bin out of wood or use a plastic storage container and adopt it for composting. The bin should be at least 12” deep, around 16” wide and 19” long, have a tight lid and holes on the bottom and sides for drainage and ventilation.
Pick a Place
Locate your bin where it will not freeze or overheat, temperature range should be between 40∞F to 85∞F. A good place could be a pantry, kitchen corner, garage or basement. Do not place the worm-bin next to a radiator. The worm-bin can be kept in a shady place outdoors from May through October, but needs to be inside for the winter.
Bedding Down the Worms
Worms like to live under lots of moist paper or leaves, which helps them stay cool and moist, giving them fiber to eat. Use regular newsprint black or color ink paper, but no glossy inserts, and shred to make 1 inch-wide strips. To moisten the paper, soak it in a bucket filled with water. Squeeze out paper so it is not dripping wet, and fluff to fill the bin 3/4 of the way – that is 9” of fluffy, moist newspaper. Now, you can add your red wiggler worms. Put them on top of the bedding and watch them disappear, as they will naturally disperse into their new home.
Maintaining Your Worm Bin
Feed worms by always burying the kitchen-scraps underneath the newspaper. Add moist newspaper as needed to keep a 4” to 6” layer of bedding over the food.
DO Feed Your Worms:
- All fruit and vegetable trimmings including citrus
- Coffee grounds and filters
- Teabags
- Crushed egg shells
- Used paper towels
- Soft green plant trimmings
DON’T Feed Your Worms:
- Meat, bones and fish
- Dairy products and grease
- Dog, cat or bird feces
- Kitty litter
- Woody prunings
- Non-biodegradable items such as plastic
All organic matter is broken down initially by naturally occurring microorganisms. To speed up this process kitchen scraps should be cut into small one-inch pieces. This initial ‘rotting’ process allows the worms to digest the organic materials.
Keep Bedding Moist, but avoid wet conditions. If your bin has too much moisture, add dry bedding, such as paper-towels, to absorb excess moisture and/or keep lid ajar. If bedding dries out on edges, spray to remoisten it.
If more and more worms are in your box, you might want to remove some. Red wigglers make great gifts and can be put in outdoor compost piles. If no worms are removed, the population will self-regulate.
Harvesting and Using Worm Castings
Congratulations! You have produced your own natural fertilizer to top-dress your houseplants or to line planting holes in you garden. Street tree pits will also benefit from the vermin-compost. Worm-castings are full of beneficial microbes and nutrients to power new plant growth instead of wasting away in a landfill. Harvest worm castings every two to three months to keep the worm population healthy, since castings become toxic to the worms over time. Start the harvesting process by not feeding your worms for two weeks. Then pile all the crumbly, dark worm-castings in one half of your bin, and place fresh bedding together with undigested paper, etc. in the other half. Resume feeding your worms, but add all food to the fresh bedding. Within two weeks worms will migrate to the new food and finished castings can be removed almost worm-free!!